
Funfetti Bunny Butter Cookies for Your 2026 Easter Cookie Box

These Funfetti Bunny Butter Cookies are tender, rich butter cookies shaped by hand into adorable bunny faces. They are a whimsical addition to my 2026 Easter Cookie Box, providing a delicate, slightly crumbly texture that isn't overly sweet.
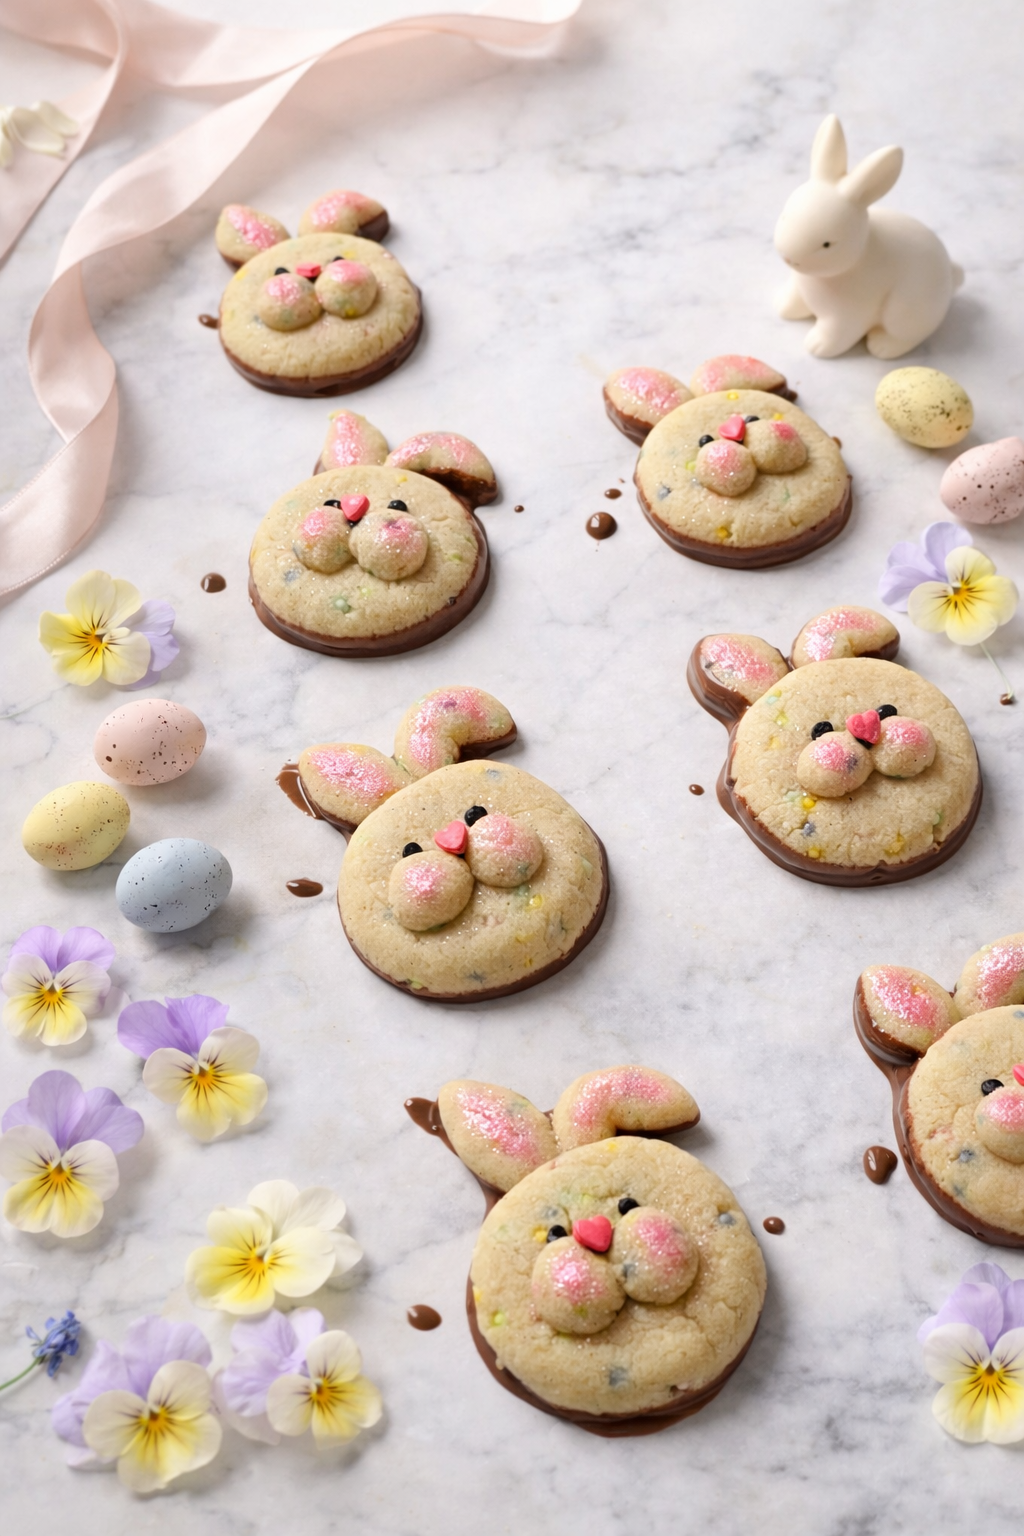
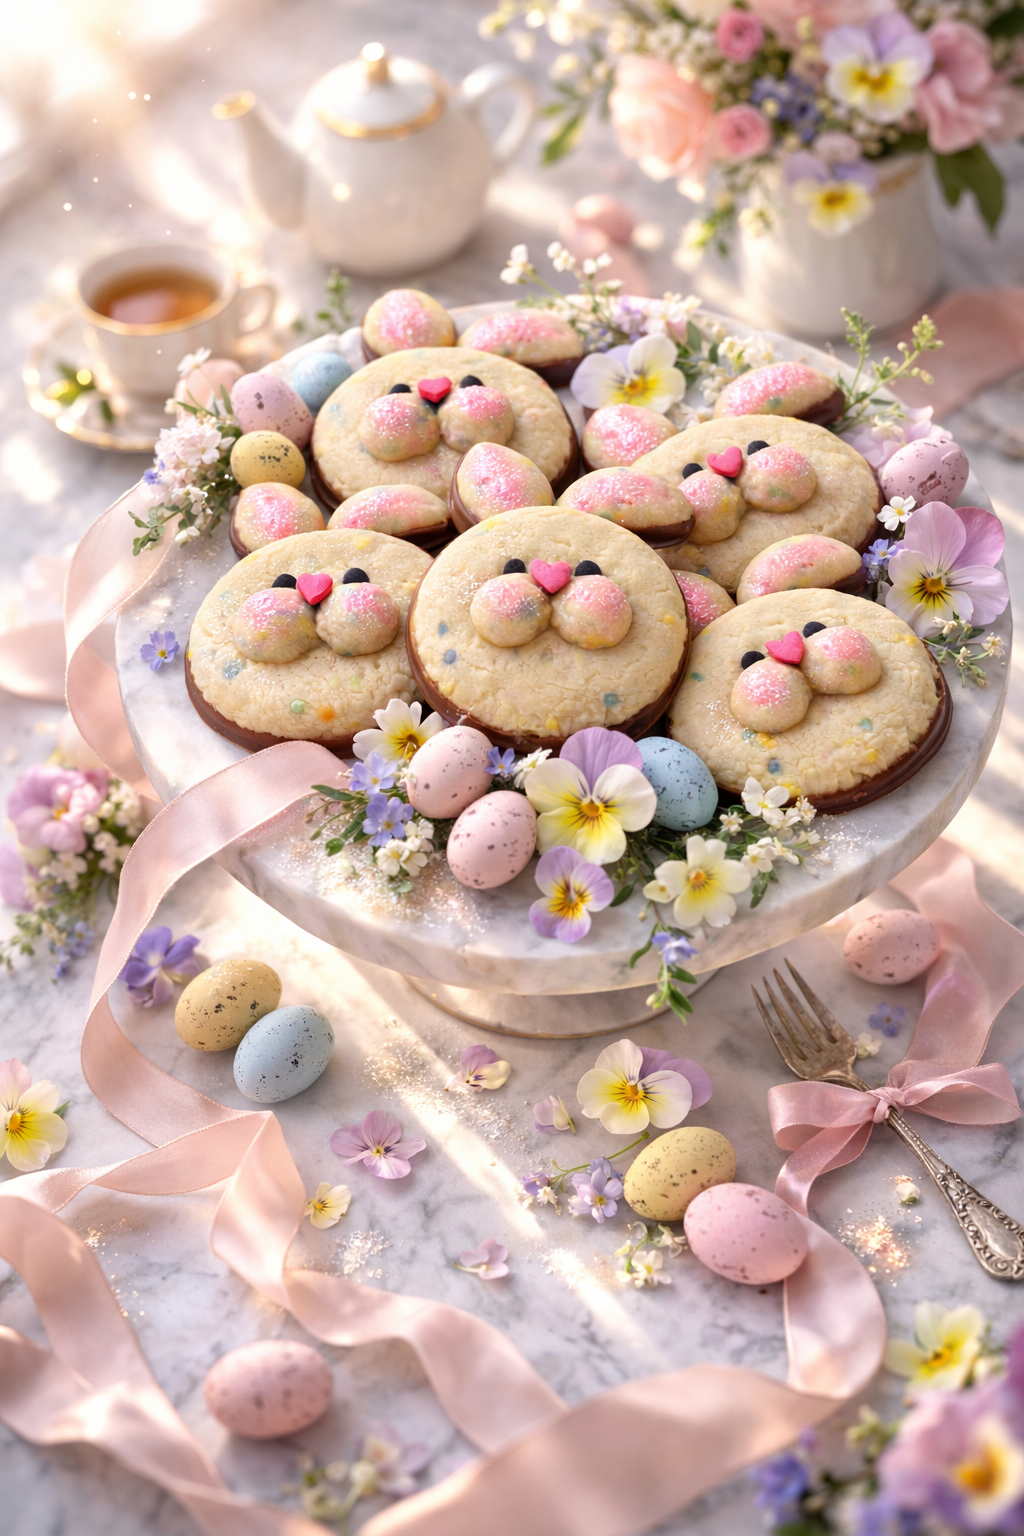
Because these cookies hold their shape remarkably well, they are the perfect companion for the Easter Egg Cookie Buttercream Macarons and the garden-themed Carrot Pops & Mini Meringues. Finished with chocolate-dipped backs and simple hand-detailed faces, they look beautiful tucked into a box alongside Sparkling Blossom Sugar Cookies, the Spring Basket Strawberry Sablé Cookies, and even homemade Easter Ducks Marshmallows.
Funfetti Bunny Butter Cookies Recipe
Yield: 20 bunny cookies (45–50 g dough each)
Finished size: about 6–7 cm tall
Ingredients
Cookie Dough:
450 g unsalted butter, room temperature
200 g powdered sugar
2 egg yolks (about 40 g)
600 g all-purpose flour
50 g cornstarch
6 g salt
80 g Pastel Nonpareils
Decorations:
Small Heart Sprinkles (for noses)
500 g Milk chocolate (for dipping and eyes)
Supplies:
Stand Mixer with Paddle Attachment
Baking Sheets
Parchment Paper
Piping Bags
Offset Spatula
Fine Brush for Dusting
Preparing and Chilling the Dough
Step 1: Cream butter and sugar Place butter and powdered sugar in a stand mixer bowl fitted with the paddle attachment. Beat on medium speed for 2–3 minutes until smooth and fluffy. Scrape the bowl thoroughly. The mixture should be pale and creamy but not overly whipped.
Step 2: Add egg yolks Add egg yolks and mix until fully incorporated. Scrape the bowl again to ensure even mixing.
Step 3: Add dry ingredients In a separate bowl, combine and whisk together the flour, cornstarch, and salt. Add to the mixer and mix on low speed until a soft dough forms. Do not overmix. The dough should be smooth, soft, and just firm enough to shape.
Step 4: Add sprinkles Fold in the pastel nonpareils gently using a spatula or low mixer speed. Avoid overmixing here to prevent the colors from bleeding into the dough.
Chilling: Wrap the dough and chill for 30 minutes if it feels very soft. If your kitchen is cool, you can begin shaping immediately. The dough should be pliable but not sticky.
Build Your 2026 Easter Cookie Box
While your dough is chilling, it is the perfect time to plan the rest of your handmade gifts! These bunnies are designed to be the centerpiece of the 2026 Easter Cookie Box. They pair beautifully with the textures of Sparkling Blossom Sugar Cookies and the bright fruit notes of Spring Basket Strawberry Sablé Cookies.
Shaping the Bunny Cookies
Each bunny is assembled from small, weighed portions of dough.
Per bunny:
Head: 25 g
Ears: 8 g each (2 pieces)
Cheeks: 5 g each (2 pieces)
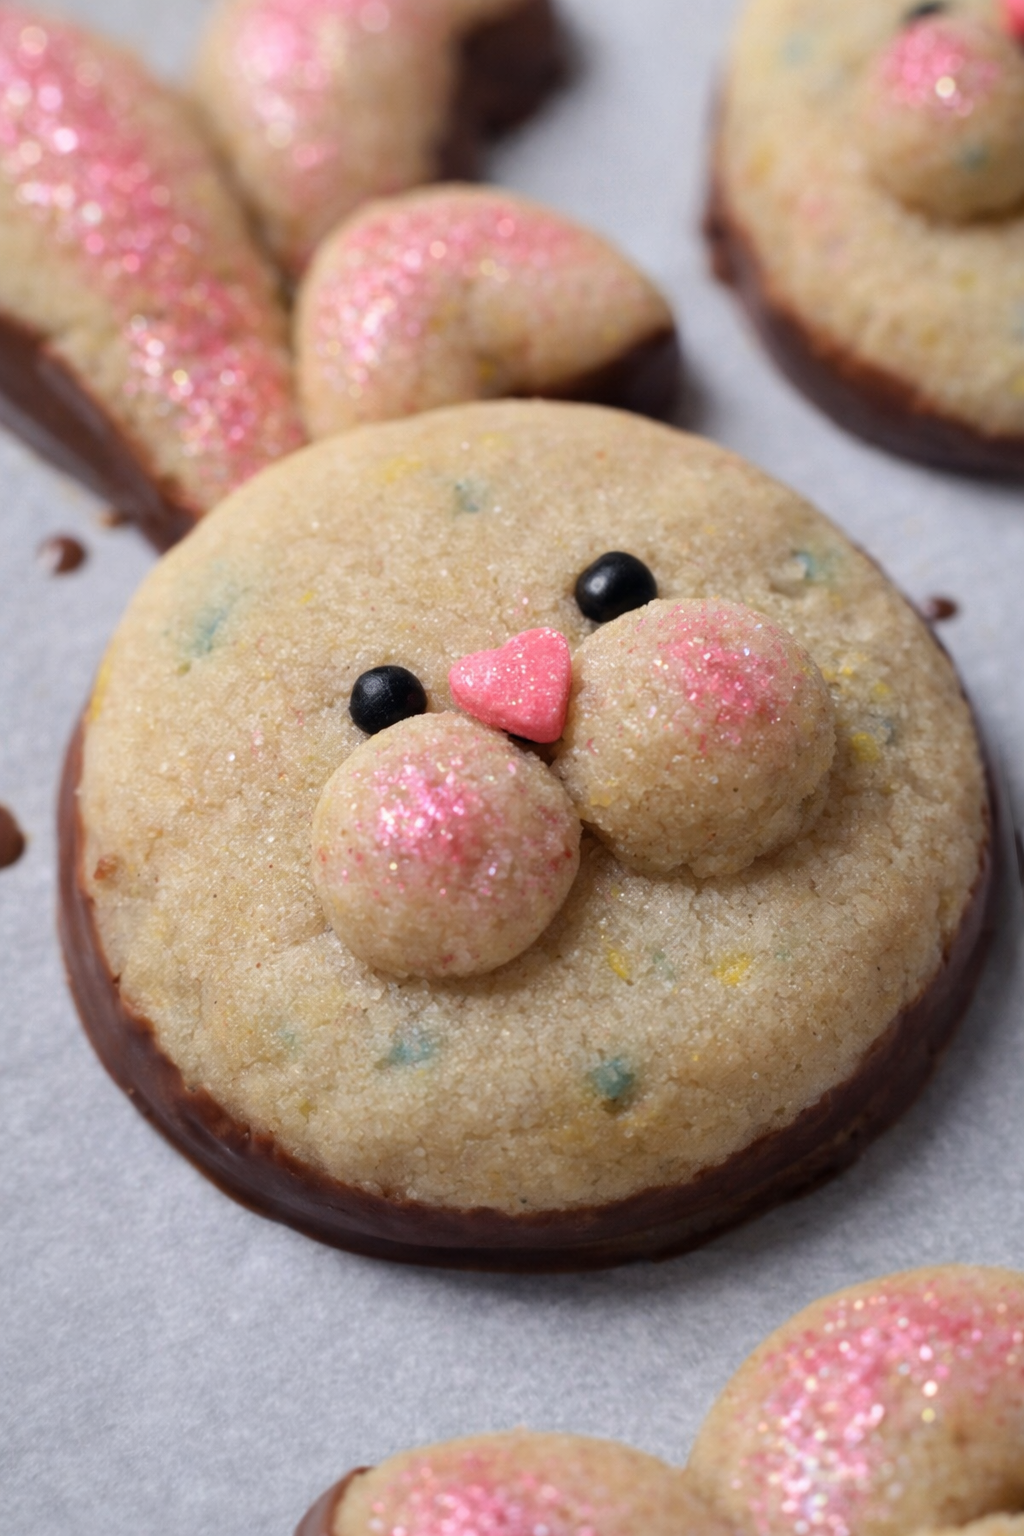
Step 1: Form head Roll the 25 g piece of dough into a smooth ball. Flatten it slightly into a rounded disk using the back of a cup, glass, or measuring cup.
Step 2: Form ears Roll two 8 g pieces into small ovals. Attach them to the top of the head and press gently where they meet. You can optionally bend one of the ears slightly for character.
Step 3: Form cheeks Roll two 5 g balls and place them on the lower half of the face. Press lightly so they adhere but remain rounded.
Arrange the bunnies on a parchment-lined baking sheet, spacing them 2 inches apart. Place the tray into the freezer to set for 30 minutes. Meanwhile, preheat your oven to 325°F.
Baking
Bake at 325°F for 14–16 minutes.
Cookies should be:
set on the edges
pale in color
lightly golden on the bottoms
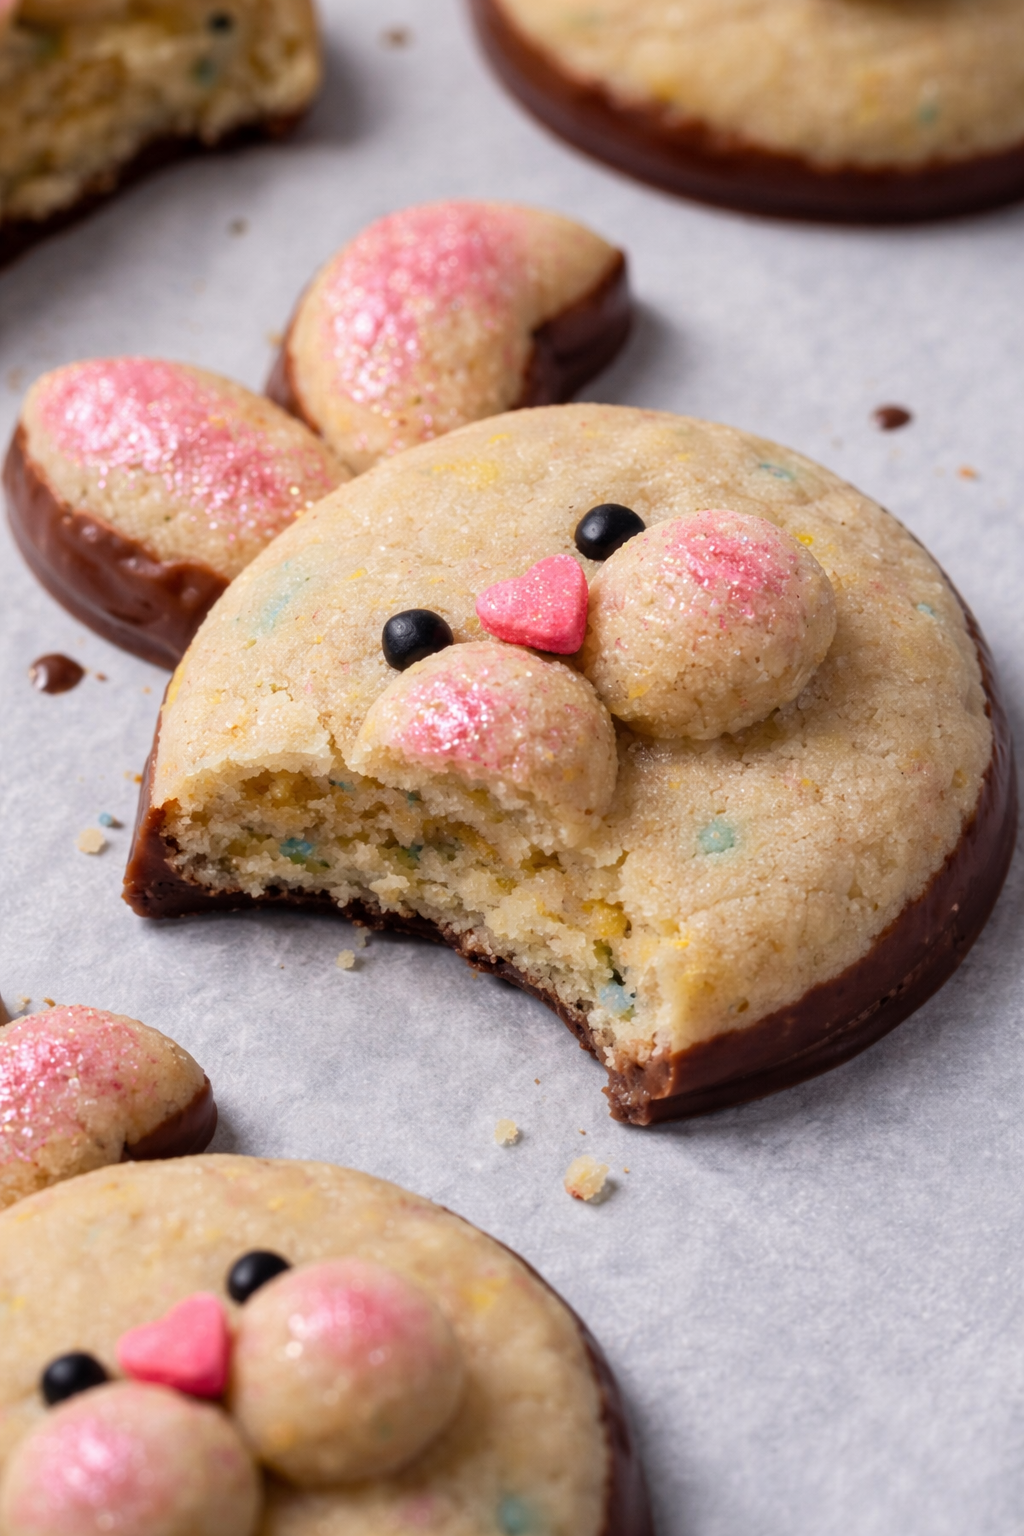
Do not overbake. These cookies are meant to remain soft. Allow them to cool completely on the tray before decorating.
Decorating and Chocolate Dipping
Facial Details: Use a toothpick or piping bag to add melted chocolate for the eyes. Attach a heart sprinkle nose using a tiny dot of melted chocolate as "glue." Lightly dust the cheeks and inner ears with the pink edible dust. Allow these details to set.
Chocolate Dipping: Melt the milk chocolate using gentle heat or a double boiler. Dip the back of each cookie into the melted chocolate and allow the excess to drip off. Place the cookies back on a parchment-lined tray. Let them set at room temperature until firm, or freeze for 5-10 minutes until the chocolate hardens.
Tips for Success
Use a scale: This is the only way to get consistent shapes so your bunnies look uniform.
Work with cool dough: This ensures the bunny features stay clean and defined.
Seams: Press the pieces together gently so the seams disappear during the bake.
Texture: The cornstarch in this recipe creates a soft, delicate crumb and prevents the cookies from spreading.
Variations:
Almond bunny cookies: Replace the vanilla with almond extract.
Vanilla bean version: Add 1 teaspoon of vanilla bean paste.
Lemon bunny cookies: Add 6 g lemon zest to the dough.
Storage:
Store these in an airtight container at room temperature for 4–5 days. Avoid stacking them until the chocolate is completely set. These bunnies are sturdy enough for treat boxes and pair beautifully with the Easter Ducks Marshmallows. The chocolate-dipped back helps protect the cookie and keeps crumbs contained when you are packaging your gifts.
Once you have finished these, make sure to check out the Easter Egg Cookie Buttercream Macarons, the Spring Basket Strawberry Sablé Cookies, the Carrot Pops & Mini Meringues, and the Sparkling Blossom Sugar Cookies to round out your set!
Baking Timeline:
Mix dough — 15 min
Portion/shape — 20 min
Chill/Freeze — 30 min
Bake — 16 min
Decorate/Set — 20 min Total active time: ~1 hour (plus chilling)

If you loved making this recipe, there’s so much more waiting for you in my book, Baking Magic: Awaken Your Inner Pastry Chef. It’s packed with simple tricks, pro tips, and show-stopping recipes to help you create unforgettable treats with ease.
Grab your copy on Amazon here and awaken your inner pastry chef today! 🍰✨
Disclaimer: Some links in this post are affiliate links, which means I may earn a small commission if you make a purchase—thank you for supporting my baking projects!

Bunny Butter Cookies
These Bunny Butter Cookies are the heart of any spring dessert spread. Tender, rich, and whimsical, these cookies are shaped by hand into adorable bunny faces. They feature a soft "sable" texture that is delicate and slightly crumbly—perfect addition to your Easter Cookie Boxes and for gifting to neighbors, teachers, or family.
Ingredients
- 450 g unsalted butter, room temperature
- 200 g powdered sugar
- 2 egg yolks (about 40 g)
- 600 g all-purpose flour
- 50 g cornstarch
- 6 g salt
- 80 g Pastel Nonpareils
- Pink Edible Dust
- Small Heart Sprinkles (for noses)
- 500 g Milk chocolate (for dipping and eyes)
Instructions
- Step 1: Cream butter and sugar Place butter and powdered sugar in a stand mixer bowl fitted with the paddle attachment. Beat on medium speed for 2–3 minutes until smooth and fluffy. Scrape the bowl thoroughly. The mixture should be pale and creamy but not overly whipped.
- Step 2: Add egg yolks Add egg yolks and mix until fully incorporated. Scrape the bowl again to ensure even mixing.
- Step 3: Add dry ingredients In a separate bowl, combine and whisk together the flour, cornstarch, and salt. Add to the mixer and mix on low speed until a soft dough forms. Do not overmix. The dough should be smooth, soft, and just firm enough to shape.
- Step 4: Add sprinkles Fold in the pastel nonpareils gently using a spatula or low mixer speed. Avoid overmixing here to prevent the colors from bleeding into the dough.
- Chilling: Wrap the dough and chill for 30 minutes if it feels very soft. If your kitchen is cool, you can begin shaping immediately. The dough should be pliable but not sticky.
- Each bunny is assembled from small, weighed portions of dough.
- Per bunny:
- Head: 25 g
- Ears: 8 g each (2 pieces)
- Cheeks: 5 g each (2 pieces)
- Step 1: Form head Roll the 25 g piece of dough into a smooth ball. Flatten it slightly into a rounded disk using the back of a cup, glass, or measuring cup.
- Step 2: Form ears Roll two 8 g pieces into small ovals. Attach them to the top of the head and press gently where they meet. You can optionally bend one of the ears slightly for character.
- Step 3: Form cheeks Roll two 5 g balls and place them on the lower half of the face. Press lightly so they adhere but remain rounded.
- Arrange the bunnies on a parchment-lined baking sheet, spacing them 2 inches apart. Place the tray into the freezer to set for 30 minutes. Meanwhile, preheat your oven to 325°F.
- Bake at 325°F for 14–16 minutes.
- Cookies should be: set on the edges, pale in color, lightly golden on the bottoms
- Do not overbake. These cookies are meant to remain soft. Allow them to cool completely on the tray before decorating.
- Facial Details: Use a toothpick or piping bag to add melted chocolate for the eyes. Attach a heart sprinkle nose using a tiny dot of melted chocolate as "glue." Lightly dust the cheeks and inner ears with the pink edible dust. Allow these details to set.
- Chocolate Dipping: Melt the milk chocolate using gentle heat or a double boiler. Dip the back of each cookie into the melted chocolate and allow the excess to drip off. Place the cookies back on a parchment-lined tray. Let them set at room temperature until firm, or freeze for 5-10 minutes until the chocolate hardens.