
Carrot Meringue Pops & Mini Meringues for Your 2026 Easter Cookie Box

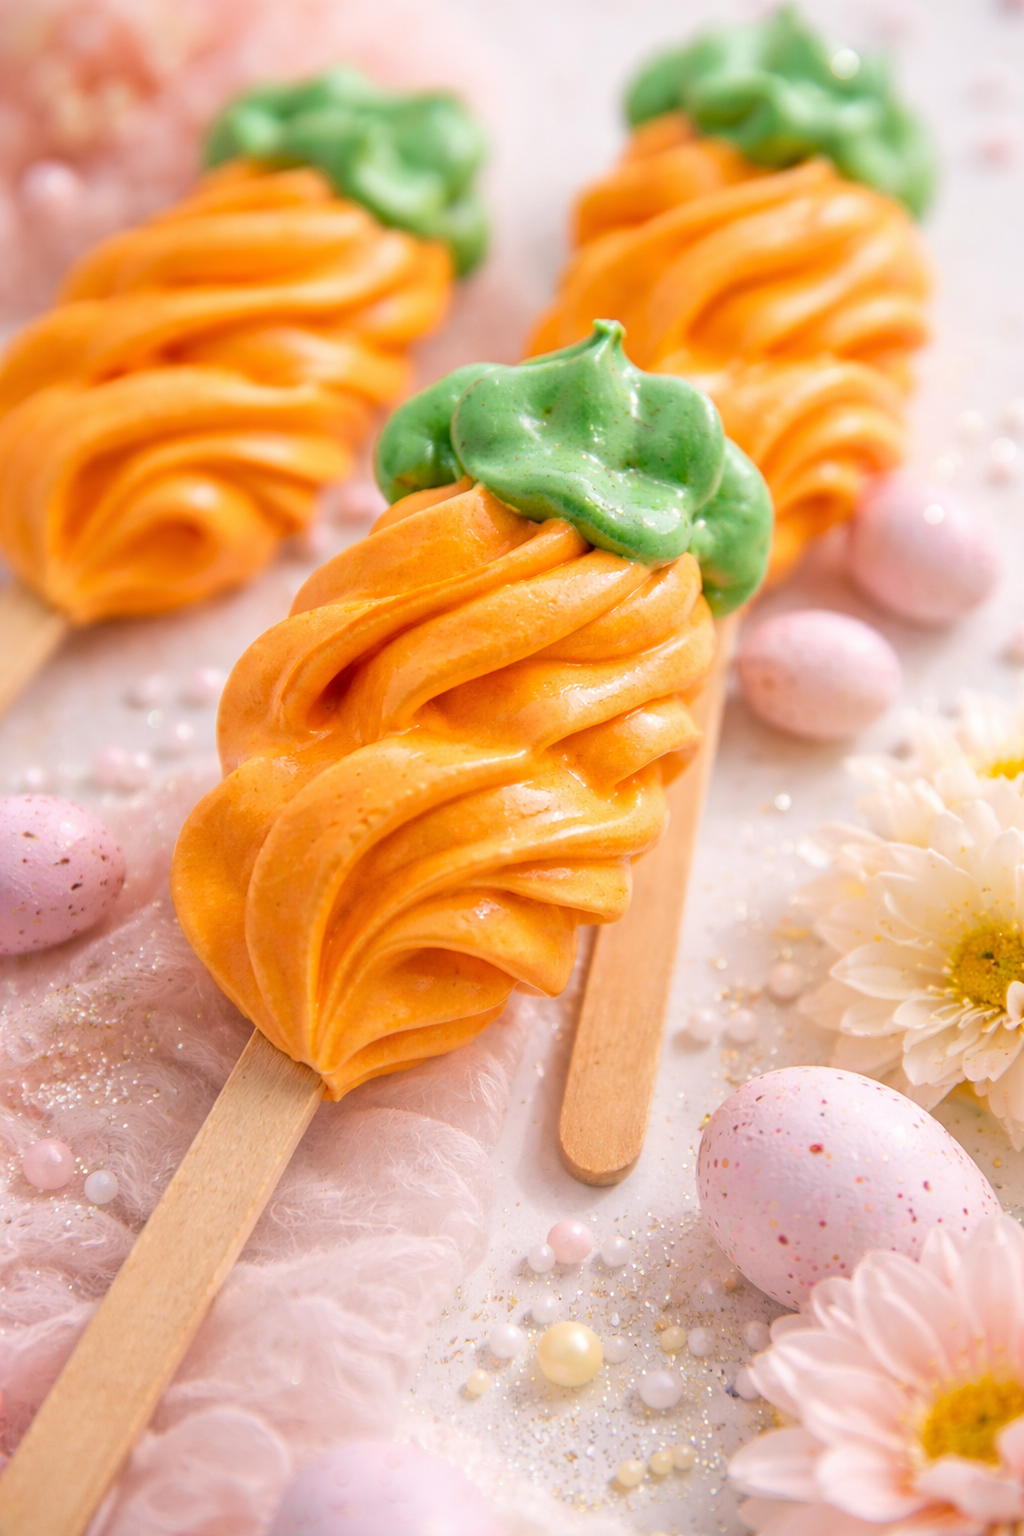
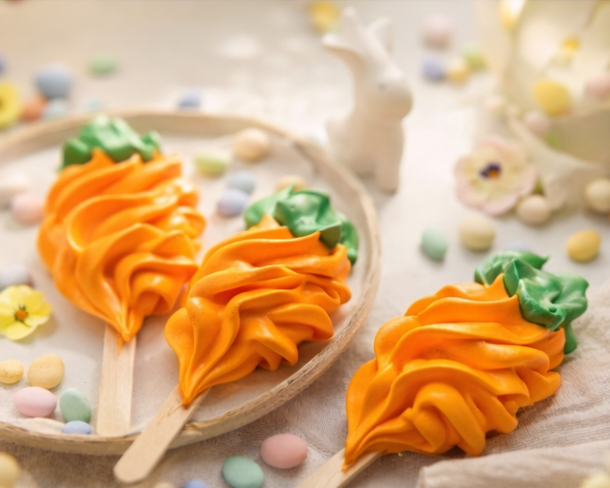
These Carrot Pops & Mini Meringues are light, crisp, and delicately sweet. Piped into whimsical carrot shapes using a classic French meringue, they are slowly baked and dried until completely crisp. They are the perfect "garden" element to decorate your Easter Cookie Box.
These meringues add height and a bright pop of orange to your set, sitting beautifully alongside the Easter Egg Cookie Buttercream Macarons and the Easter Ducks Marshmallows. They also provide a crunchy texture contrast to the Spring Basket Strawberry Sablé Cookies, the Sparkling Blossom Sugar Cookies, and the Funfetti Bunny Butter Cookies.
The Art and Science of the Perfect Meringue
Before we dive into the steps, it is helpful to understand what makes a French meringue successful in a home kitchen. Meringue is essentially a foam of air bubbles trapped in egg whites, stabilized by sugar.
Because we are baking these at a very low temperature 200 F, we are essentially dehydrating the shapes rather than "cooking" them. This preservation of the bright orange and green colors is what makes them look so fresh in a spring-themed box. If the oven is even 25° too hot, the sugar will caramelize, turning your vibrant carrots into a dull, toasted brown.
Yield
Approximately 10 large carrot meringue pops and 50 mini carrot meringues.
Ingredients
Meringue Base:
200 g egg whites (room temperature)
400 g granulated sugar
3 g cream of tartar (about ½ tsp)
Orange and green gel food coloring
Supplies:
Stand Mixer with Whisk Attachment
Piping Bags
Reversible Silicone Macaron Baking Mat or Parchment Paper
Wooden sticks (for large carrot pops)


Directions
Step 1: Preheat and Begin Whipping
Preheat your oven to 200°F (95°C). Add the room-temperature egg whites and cream of tartar to the mixer bowl. Whip on medium speed until foamy, then increase to medium-high until soft peaks form.
Step 2: Add Sugar Gradually
With the mixer running, add the sugar slowly, one tablespoon at a time. This ensures the sugar dissolves properly for a stable, glossy meringue. Continue whipping for 8–10 minutes until stiff peaks form and the mixture no longer feels grainy when rubbed between your fingers.
Step 3: Divide and Color
Divide the meringue into two portions: a larger portion for the orange carrots and a smaller portion for the green tops. Fold in the gel coloring gently to avoid deflating the meringue.
Step 4: Pipe Carrot Shapes
Large Carrot Pops: Transfer orange meringue to a bag with a 1M tip. Pipe a swirled cone shape over a wooden stick on your Silicone Baking Mat. Use the green meringue with a large leaf tip to pipe the tops.
Mini Carrots: Pipe smaller cone shapes (3–4 cm) and add tops with the mini leaf tip. Space them about 2 cm apart.
Step 5: Bake and Dry
Bake at 200°F for 2 hours. After the time is up, turn off the oven, leave the door slightly ajar, and allow the meringues to dry inside for at least 1 hour. They should lift easily from the mat and feel completely crisp.
Step 6: Cooling and Storage
Allow meringues to cool completely before handling. Store in an airtight container at room temperature. Keep them away from humidity, as moisture will soften the crisp texture.
Troubleshooting & Tips
Meringue is grainy: The sugar was added too quickly. Add it slowly next time to ensure it dissolves fully.
Meringue collapses: Egg whites may have had fat contamination or were under-whipped. Ensure your bowl is grease-free.
Browning occurs: Your oven temperature is too high. Reduce the temperature by 10–15°C for your next batch.
Chewy centers: If the centers aren't crisp, bake them longer at a very low temperature.
Piping Speed: Pipe all your shapes immediately after whipping. Meringue becomes harder to work with the longer it sits in the bag.
Scaling: This recipe doubles well, but for the best results, whip in two separate bowls rather than overfilling the mixer.
Flavor Variations & Packaging
Customizing your Carrots:
Add a small amount of vanilla extract for a classic flavor.
Incorporate citrus zest for a bright, light taste.
Dust with edible shimmer after baking for a magical finishing touch.
Avoid adding liquid flavorings that can destabilize the meringue.
Packaging for Treat Boxes:
Place meringues in your Easter Cookie Box only after they are completely dry. Separate layers with parchment if needed and avoid storing them with "moist" items (like fresh fruit or non-set buttercream). Meringues are fragile but hold their shape beautifully if packed snugly.
Storage:
Meringues will stay crisp for up to 1 week in dry, airtight conditions at room temperature. Do not refrigerate.

If you loved making this recipe, there’s so much more waiting for you in my book, Baking Magic: Awaken Your Inner Pastry Chef. It’s packed with simple tricks, pro tips, and show-stopping recipes to help you create unforgettable treats with ease.
Grab your copy on Amazon here and awaken your inner pastry chef today! 🍰✨
Disclaimer: Some links in this post are affiliate links, which means I may earn a small commission if you make a purchase—thank you for supporting my baking projects!

Carrot Pops & Mini Carrots Meringue Cookies
Master the art of French meringue with this complete guide to Easter Carrot Pops and mini meringue cookies. Learn the perfect "snap," stable piping techniques, and moisture-proof storage. These crisp, airy treats are the perfect whimsical addition to your 2026 Easter Cookie Box or spring dessert table.
Ingredients
- 200 g egg whites (room temperature)
- 400 g granulated sugar
- 3 g cream of tartar (about ½ tsp)
- Orange and green gel food coloring
Instructions
- Preheat your oven to 200°F (95°C). Add the room-temperature egg whites and cream of tartar to the mixer bowl. Whip on medium speed until foamy, then increase to medium-high until soft peaks form.
- With the mixer running, add the sugar slowly, one tablespoon at a time. This ensures the sugar dissolves properly for a stable, glossy meringue. Continue whipping for 8–10 minutes until stiff peaks form and the mixture no longer feels grainy when rubbed between your fingers.
- Divide the meringue into two portions: a larger portion for the orange carrots and a smaller portion for the green tops. Fold in the gel coloring gently to avoid deflating the meringue.
- Large Carrot Pops: Transfer orange meringue to a bag with a 1M tip. Pipe a swirled cone shape over a wooden stick on your Silicone Baking Mat. Use the green meringue with a large leaf tip to pipe the tops.
- Mini Carrots: Pipe smaller cone shapes (3–4 cm) and add tops with the mini leaf tip. Space them about 2 cm apart.
- Bake at 200°F for 2 hours. After the time is up, turn off the oven, leave the door slightly ajar, and allow the meringues to dry inside for at least 1 hour. They should lift easily from the mat and feel completely crisp.
- Allow meringues to cool completely before handling. Store in an airtight container at room temperature. Keep them away from humidity, as moisture will soften the crisp texture.