
Shaped Chocolate Brownie Bees
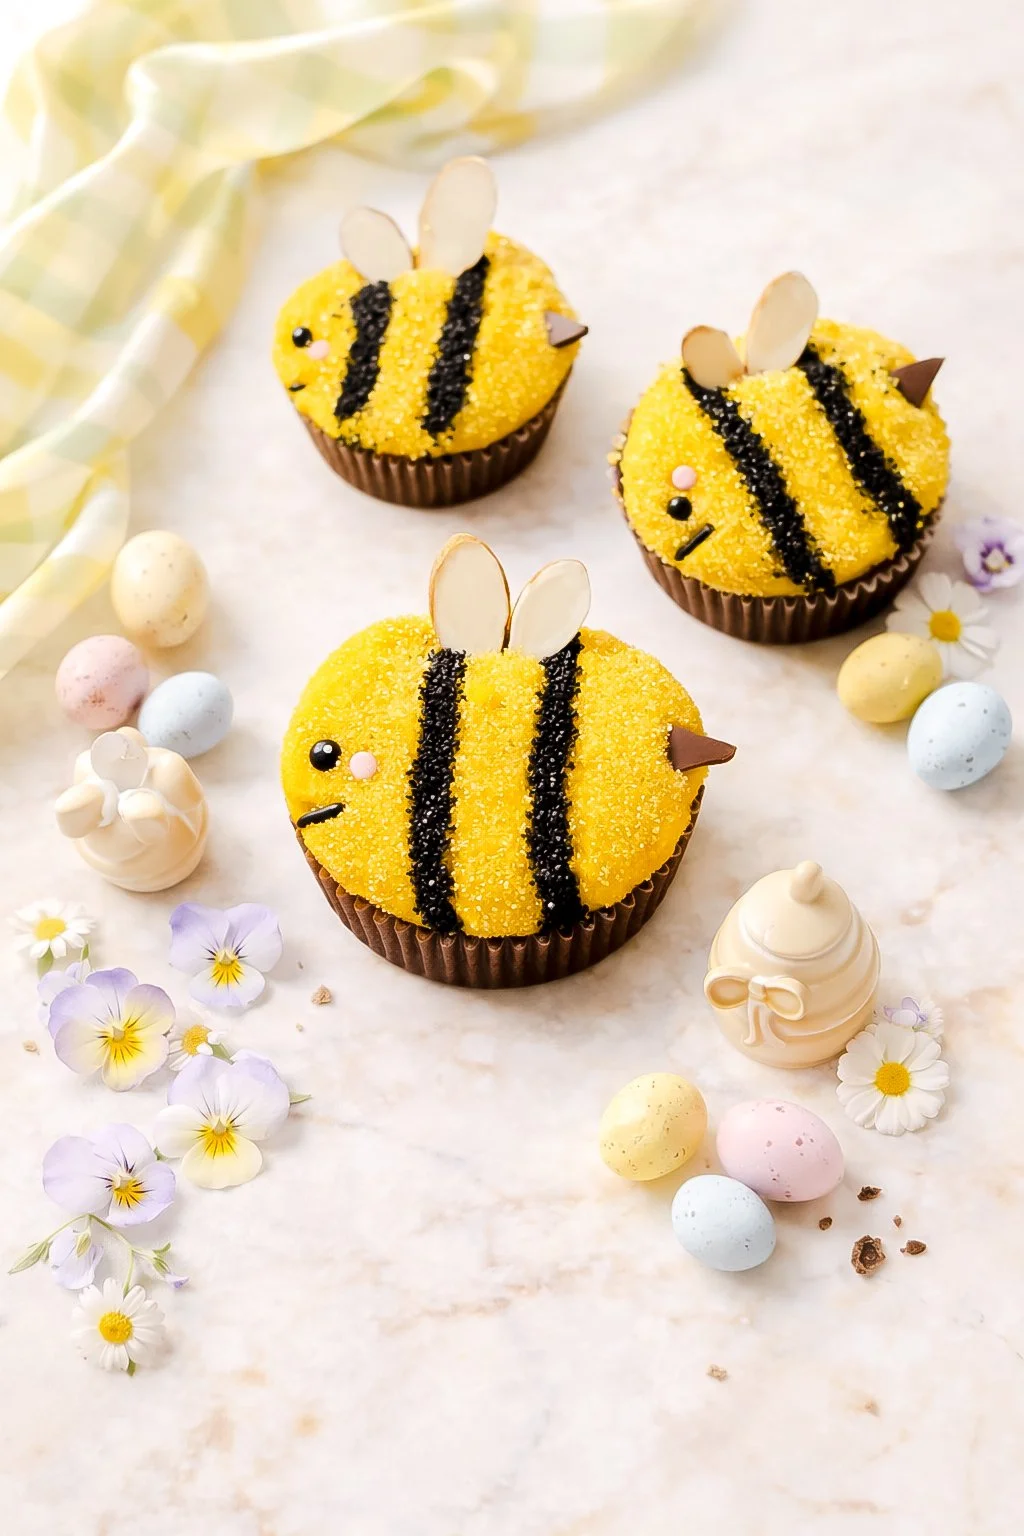
Too adorable to devour, too delicious to resist! These decadent, rich chocolate brownies with perfectly crinkly tops are shaped, baked, and easily decorated as extra cute bumblebees!
Small Batch Brownie Recipe (makes 6)
Ingredients:
43 g granulated sugar
45 g dark brown sugar
1 egg, room temperature
38 g unsalted butter, room temperature
33 g dark chocolate chips/chunks
18 g vegetable oil
½ tsp vanilla extract
25 g all-purpose flour
16 g unsweetened cocoa powder
1 tsp cornstarch
1/8 tsp salt
16 g dark chocolate (for folding in)
Directions:
Step 1: Preheat & Prep:
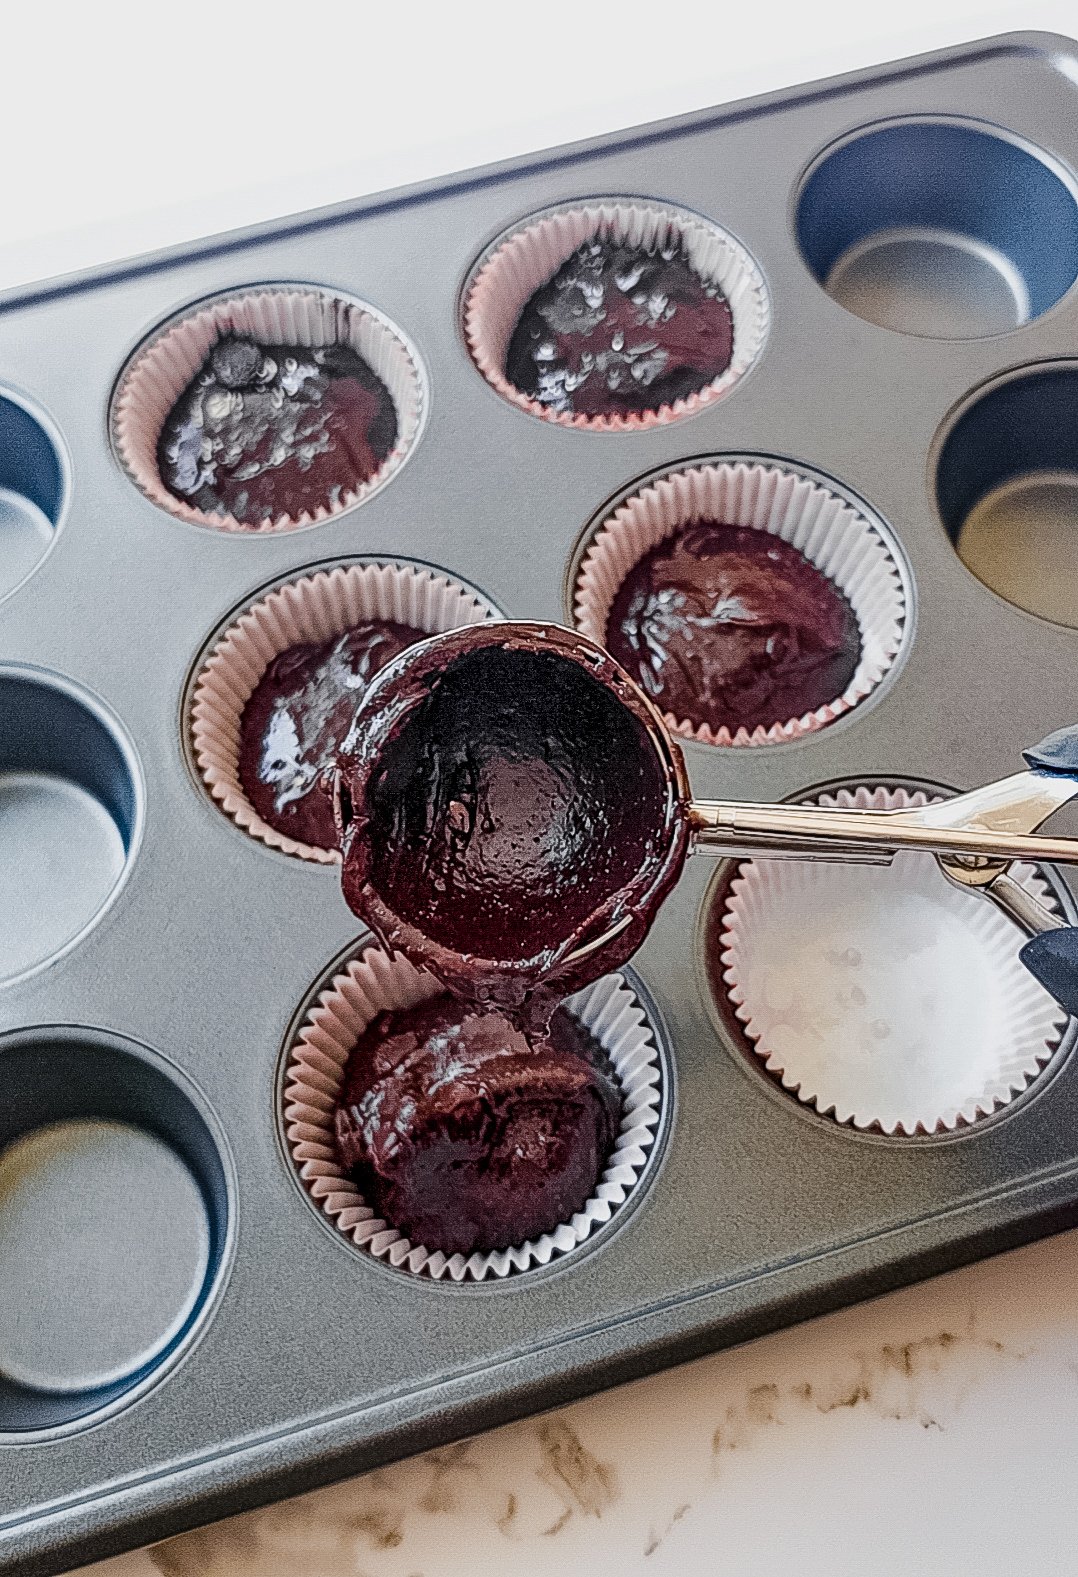
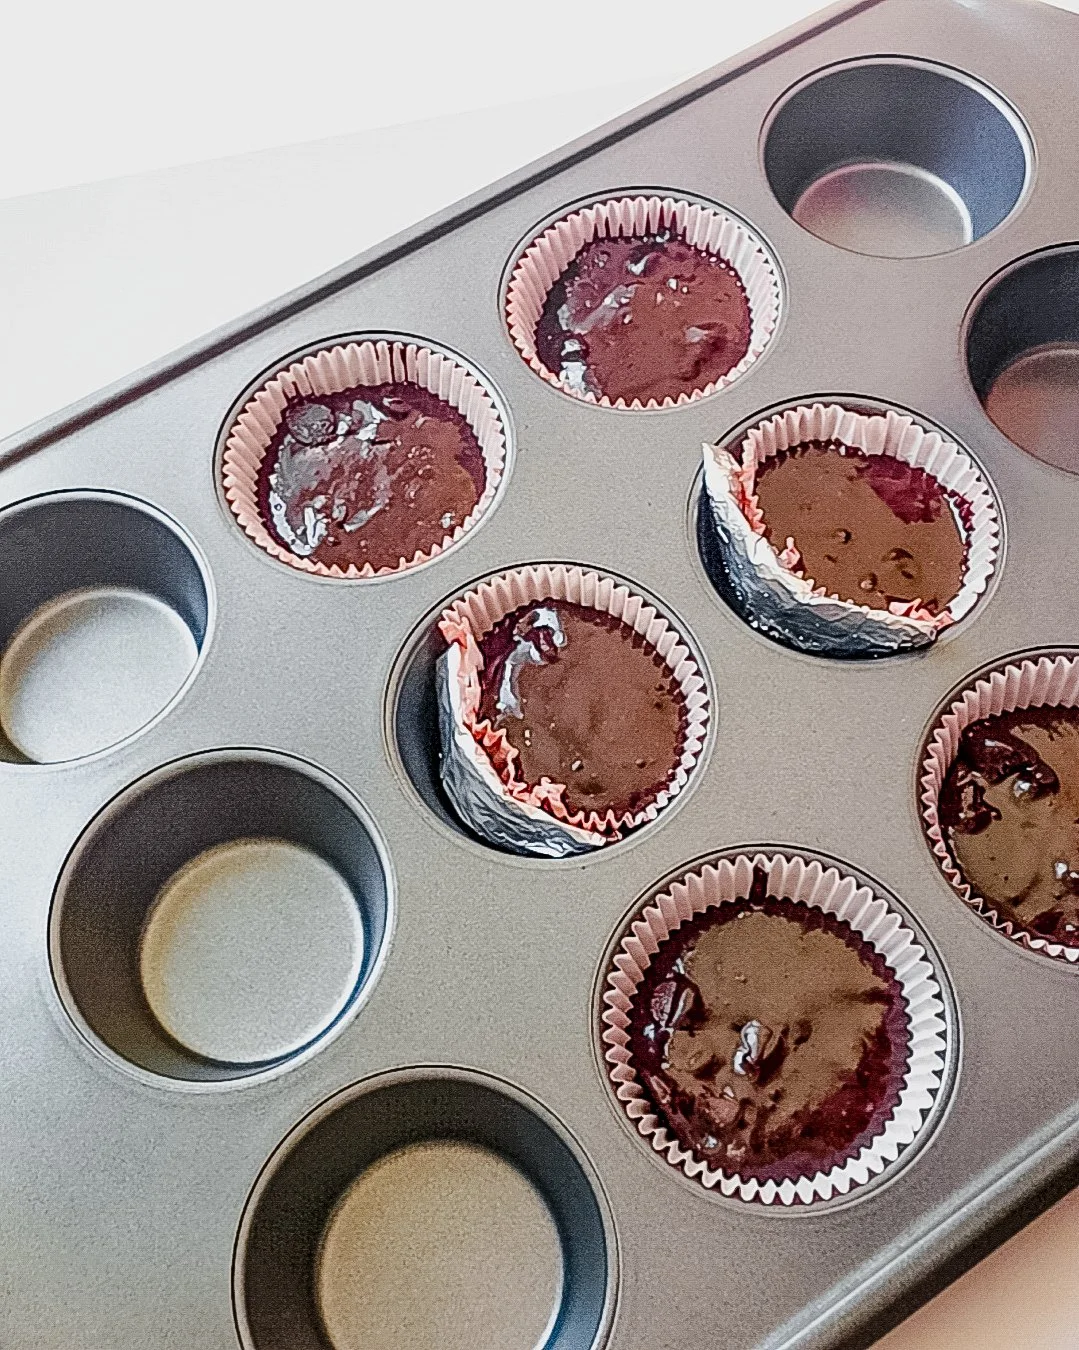
Start by preheating your oven to 325°F. Fit the cupcake baking pan/tin with cupcake liners. Fold 6 foil rectangles and set aside.
Step 2: Cream the Sugars and Eggs:
In the bowl of your stand mixer (fitted with the paddle attachment), combine the granulated sugar and dark brown sugar with the egg. Beat on high speed until the mixture is light, fluffy, and creamy—this gives your brownies that perfect texture and richness.
Step 3: Melt the Butter and Chocolate:
While the sugar and egg mixture is coming together, melt the unsalted butter in a heatproof bowl by microwaving it in 15-second intervals. Stir between each interval to avoid overheating. Once the butter is melted, add the dark chocolate chips and stir until completely smooth. This mixture will be the secret to your fudgy brownie texture—don’t skimp on it!
Step 4: Combine Wet Ingredients:
Now, turn the speed of the mixer to low and slowly pour in the butter-chocolate mixture, vegetable oil, and vanilla extract. Mix until everything is fully incorporated, and your batter is as rich as your chocolate dreams.
Step 5: Sift and Mix Dry Ingredients:
In a separate bowl, sift together the all-purpose flour, unsweetened cocoa powder, cornstarch, and salt. Add this dry mixture to the wet ingredients while your mixer is on low speed. Mix until just combined—overmixing will make your brownies dense, and we’re all about that perfect fudgy texture here.
Step 6: Fold in Extra Chocolate:
This is the part where you really elevate the chocolatey goodness. Gently fold in the 1/2 cup of dark chocolate with a silicone spatula. This extra chocolate ensures each bite is filled with gooey, melty goodness.
Step 7: Bake the Brownies:
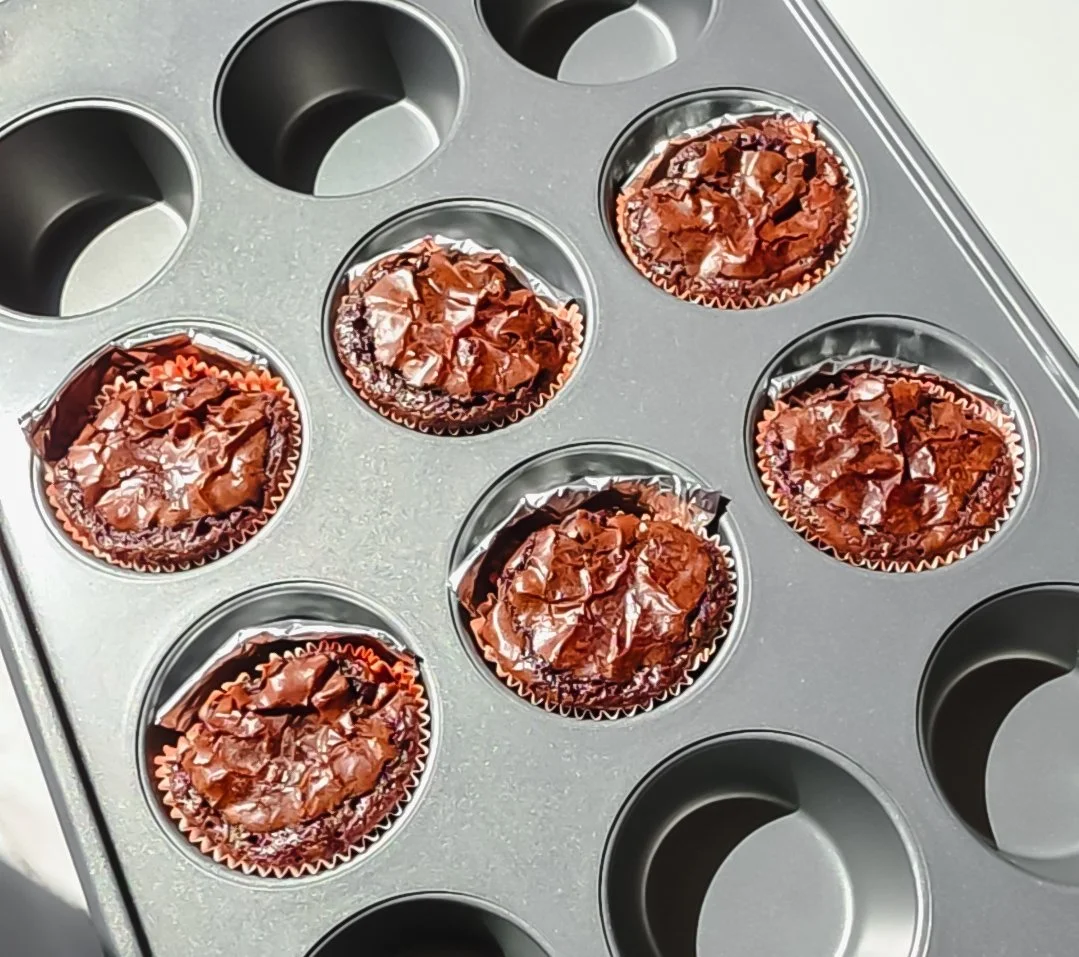
Pour the brownie batter into the liners, filling each ¾ of the way. Fit in a foil rectangle on the side of each liner to form the “oval” shape. Bake for 18-20 minutes on the middle rack. When you insert a toothpick, it should come out mostly clean, with a few crumbs stuck to it—that’s when you know they’re perfect!
Decorate & Garnish:
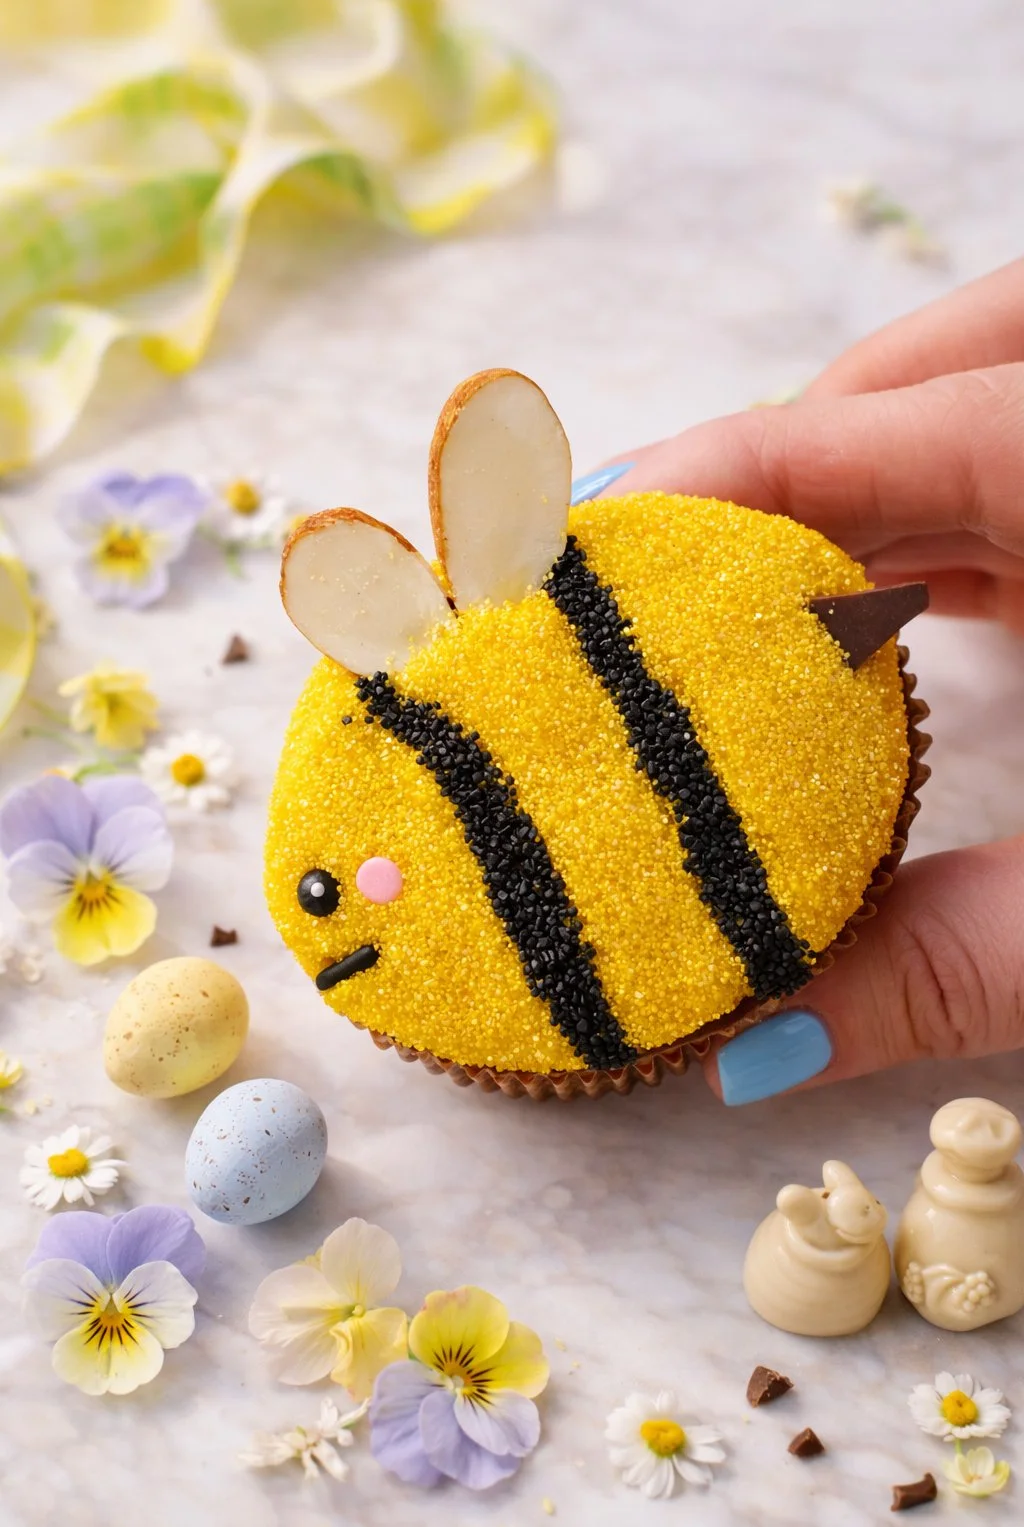
36 yellow candy melts pieces
yellow sparkling sugar or nonpareils
black sparkling sugar or nonpareils
almond slivers
semi-sweet chocolate morsels, halved
black round, jimmy, and pink funfetti sprinkles for bees "face"
Once your brownies are baked, remove them from the oven and immediately place 6 yellow candy melts on each of the brownie, allowing it to melt. Swirl and smooth out the yellow candy melts using a chopstick, spoon, or small off-set spatula, and immediately sprinkle the yellow sparkling sugar. Using a chopstick or handle of a spoon or drinking straw, press in two indentations/lines to form the "stripes"; sprinkle in the black sparkling sugar into these indentations using a spoon. Adhere the almond slivers "wings", halved morsel, and "face" sprinkles.
Troubleshooting Tips
Every baker’s gotta have a few tips up their sleeve! Here are a couple of things to keep in mind when making these brownie pops:
Brownies Too Fudgy?
If your brownies seem too underdone or too gooey when you slice into them, they might need a few more minutes of baking. Remember, every oven is different, so keep an eye on them. A toothpick should come out mostly clean, but with a few moist crumbs for that ideal fudgy texture.Too Dense or Hard?
Overmixing your batter can lead to dense brownies. Make sure to mix the dry ingredients just until combined. The less you mix, the fluffier and fudgier your brownies will be.Too Sweet?
If you find the sweetness to be a bit much, you can always dial back the sugar by 1/4 cup. These brownies are rich enough that you can reduce the sweetness without compromising the overall flavor.
Tools and Equipment
Here’s a quick list of tools and equipment that will make this process easier:
Stand Mixer or Hand Mixer: For easy mixing of your wet ingredients and sugar. If you don’t have a mixer, a hand whisk will do the trick—just put in some muscle!
Cupcake Baking Tin & Cupcake Liners
Spatula: A good silicone spatula is perfect for folding in that extra chocolate and ensuring your batter is smooth and mixed well.
Sifter: For sifting your dry ingredients. This helps avoid lumps and ensures even distribution of the cocoa powder and flour.
Toothpicks or Cake Tester: To check if your brownies are done baking.
These Shaped Chocolate Brownie Bees are the perfect festive treat for this spring and easter season, and I promise they’ll be the hit of any celebration. Whether you’re baking for the Easter or Spring party, a family gathering, or just because (because who needs an excuse to eat brownies?), these treats will add a touch of magic to your holiday spread.
I hope you love making and sharing these as much as I do! Don’t forget to tag me @sashacakeschicago when you make them—I can’t wait to see your creative decorations! 🐝🍫
Ready to Take Your Baking to the Next Level?

If you loved making these Shaped Chocolate Brownie Bees, there’s so much more waiting for you in my book, Baking Magic: Awaken Your Inner Pastry Chef. It’s packed with simple tricks, pro tips, and show-stopping recipes to help you create unforgettable treats with ease.
Grab your copy on Amazon here and awaken your inner pastry chef today! 🍰✨

Shaped Chocolate Brownie Bees
Rich, fudgy brownies with perfectly crinkly tops, shaped and decorated as cutest bees! Too adorable to eat, but so fun to make and are irresistibly delicious.
Ingredients
- 43 g granulated sugar
- 45 g dark brown sugar
- 1 egg, room temperature
- 38 g unsalted butter, room temp
- 33 g dark chocolate chips/chunks
- 18 g vegetable oil
- 1/2 tsp vanilla extract
- 25 g all-purpose flour
- 16 g unsweetened cocoa powder
- 1 tsp cornstarch
- 1/8 tsp salt
- 16 g dark chocolate (for folding in)
- 36 yellow candy melts pieces
- yellow sparkling sugar or nonpareils
- black sparkling sugar or nonpareils
- almond slivers
- semi-sweet chocolate morsels, halved
- black round, jimmy, and pink funfetti sprinkles for bees "face"
Instructions
- Preheat & Prep: Start by preheating your oven to 325°F. Fit cupcake baking tin with cupcake liners. Shape slim, long foil rectangles.
- Cream the Sugars and Eggs: In the bowl of your stand mixer (fitted with the paddle attachment), combine the granulated sugar and dark brown sugar with the eggs. Beat on high speed until the mixture is light, fluffy, and creamy —this gives your brownies that perfect texture and richness.
- Melt the Butter and Chocolate: While the sugar and egg mixture is coming together, melt the unsalted butter in a heatproof bowl by microwaving it in 15-second intervals. Stir between each interval to avoid overheating. Once the butter is melted, add the dark chocolate chips and stir until completely smooth. This mixture will be the secret to your fudgy brownie texture—don’t skimp on it!
- Combine Wet Ingredients: Now, turn the speed of the mixer to low and slowly pour in the butter-chocolate mixture, vegetable oil, and vanilla extract. Mix until everything is fully incorporated, and your batter is as rich as your chocolate dreams.
- Sift and Mix Dry Ingredients: In a separate bowl, sift together the all-purpose flour, unsweetened cocoa powder, cornstarch, and salt. Add this dry mixture to the wet ingredients while your mixer is on low speed. Mix until just combined—overmixing will make your brownies dense, and we’re all about that perfect fudgy texture here.
- Fold in Extra Chocolate: This is the part where you really elevate the chocolatey goodness. Gently fold in the 1/2 cup of dark chocolate with a silicone spatula. This extra chocolate ensures each bite is filled with gooey, melty goodness.
- Bake the Brownie Cake: Using a cookie scooper, pour the brownie batter into your prepared cupcake baking pan fit with cupcake liners, filling 3/4 of the way. Fit-in thin, long rectangle shaped foils on the side of the liners to form the "moon" shape (reference video below). Place the tin into the middle rack of the oven and bake for 18-20 minutes. When you insert a toothpick, it should come out mostly clean, with a few crumbs stuck to it—that’s when you know they’re perfect!
- Decorate: Once your brownies are baked, remove them from the oven and immediately place 6 yellow candy melts on each of the brownie, allowing it to melt. Swirl and smooth out the yellow candy melts using a chopstick, spoon, or small off-set spatula, and immediately slrinkle the yellow sparkling sugar. Using a chopstick or handle of a spoon or drinking straw, press in two indentations/lines to form the "stripes"; sprinkle in the black sparkling sugar into these indentations using a spoon. Adhere the almond slivers "wings", halved morsels, and "face" sprinkles.


