
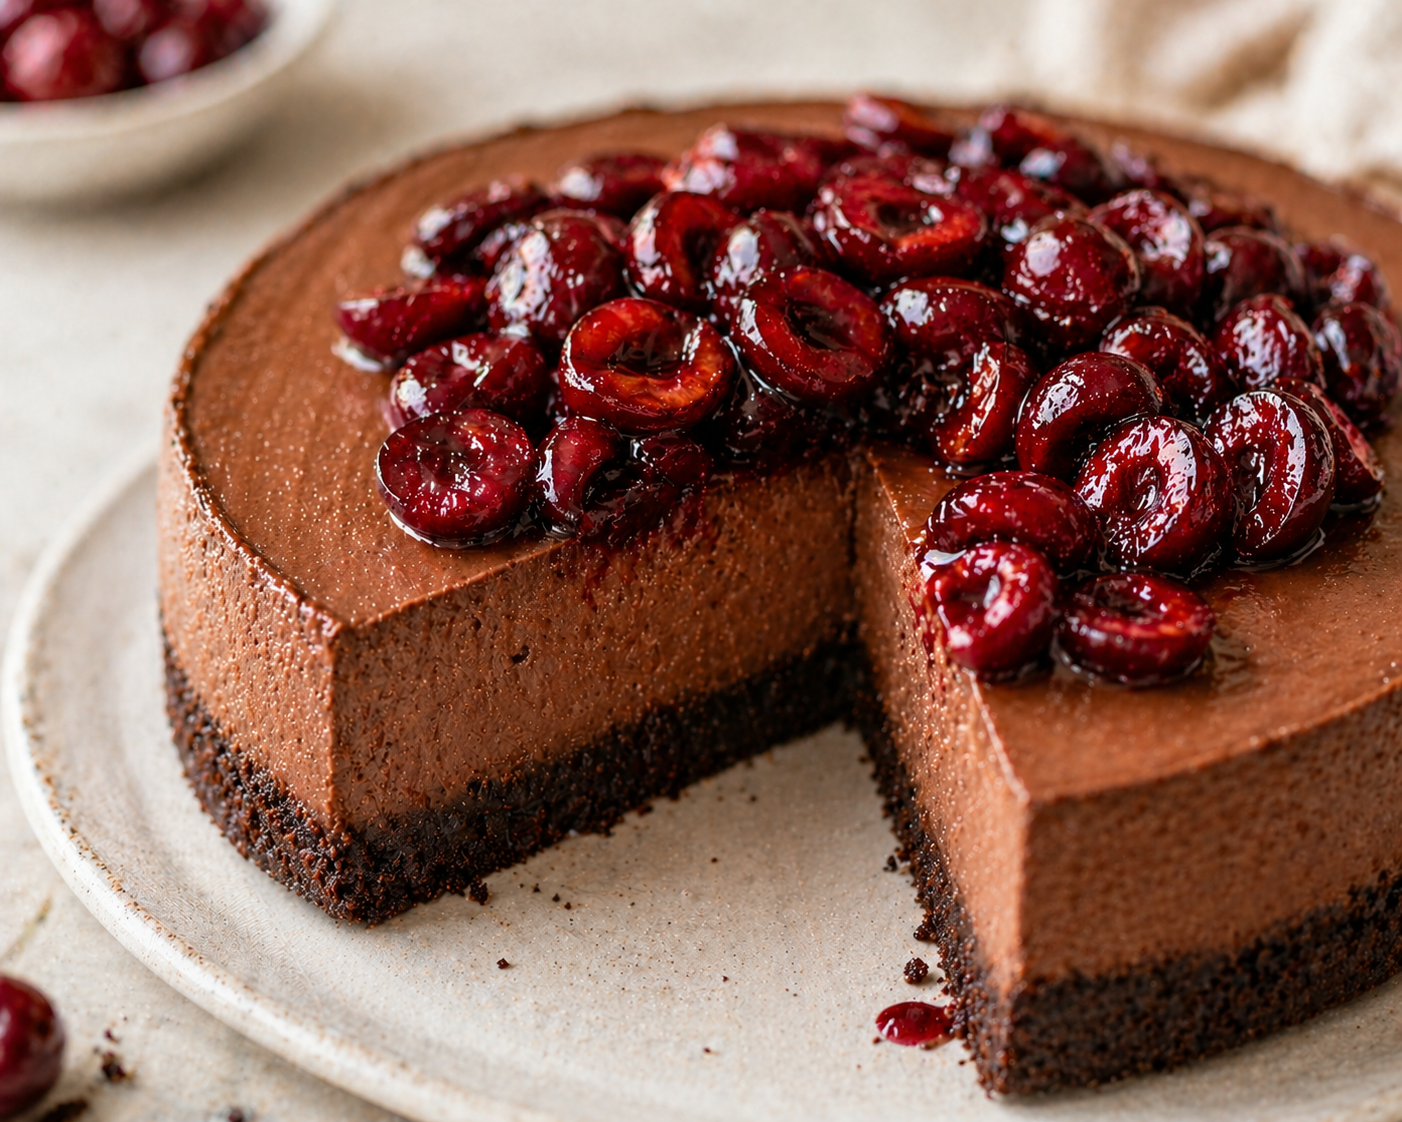
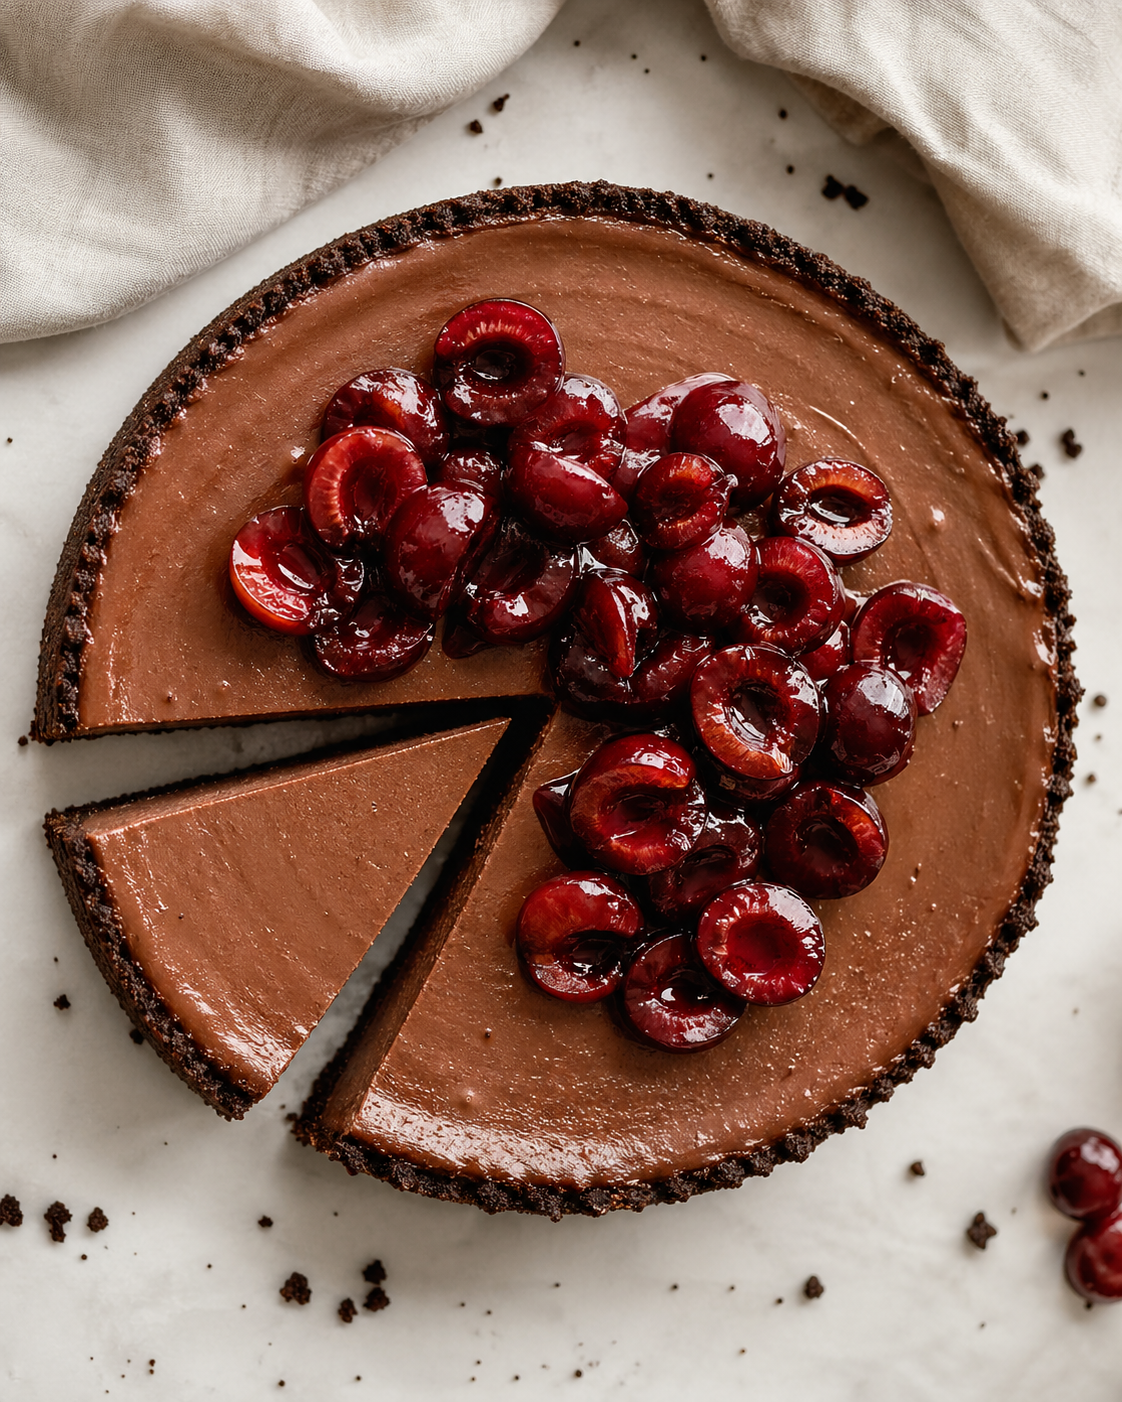
Creamy Chocolate Cheesecake With Fresh Cherries

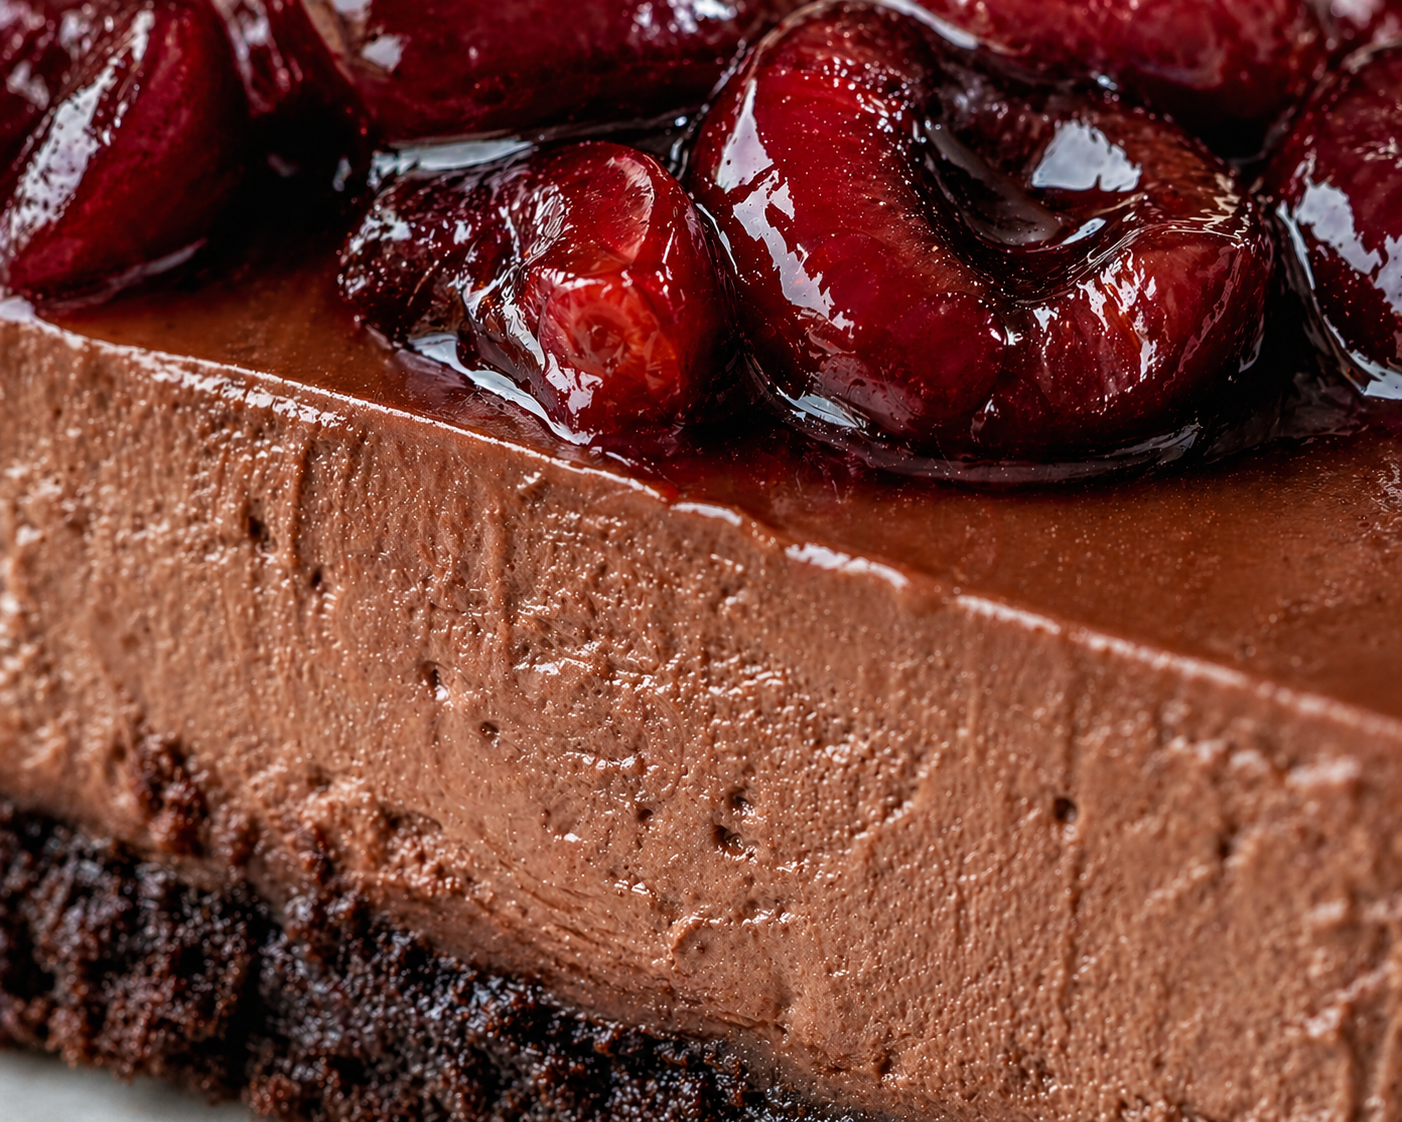
This chocolate cheesecake is ultra-creamy, rich, silky, and deeply chocolatey without feeling too heavy. The filling is crafted with cream cheese, cocoa, espresso powder, warm melted dark chocolate, and a touch of heavy cream for the smoothest possible texture. By baking low and slow in a water bath and chilling overnight, the texture sets into a perfect dense-but-creamy slice. Finishing it with fresh cherries adds a beautiful pop of color and a juicy brightness that perfectly complements the deep chocolate flavor.
Highlights Of This Recipe
Deeply Chocolatey: Uses a combination of cocoa powder, espresso powder, and melted dark chocolate for a complex, rich flavor.
Ultra-Silky Texture: The addition of heavy cream and a slow-bake water bath method ensures a smooth, bakery-style finish.
Balanced Sweetness: Fresh cherries provide a bright, juicy contrast to the decadence of the cheesecake.
Versatile Sizing: Can be made in a 7-inch or 8-inch springform pan depending on your preferred thickness.
Essential Prep for Success
Room Temperature Ingredients: This is the biggest rule for success. Ensure your cream cheese, eggs, egg yolks, and heavy cream are all at room temperature before you begin to prevent lumps and keep the batter smooth.
Water Bath Setup: Prepare a slightly deeper baking dish or roasting pan and have boiling water ready to create the gentle steam needed for baking.
Pan Preparation: Line your springform pan with a parchment round and consider a parchment collar for an easy, clean release.
Ingredients
Chocolate Crust
130 g Oreo cookie crumbs
10 g granulated sugar
Pinch of salt
40 g unsalted butter, melted
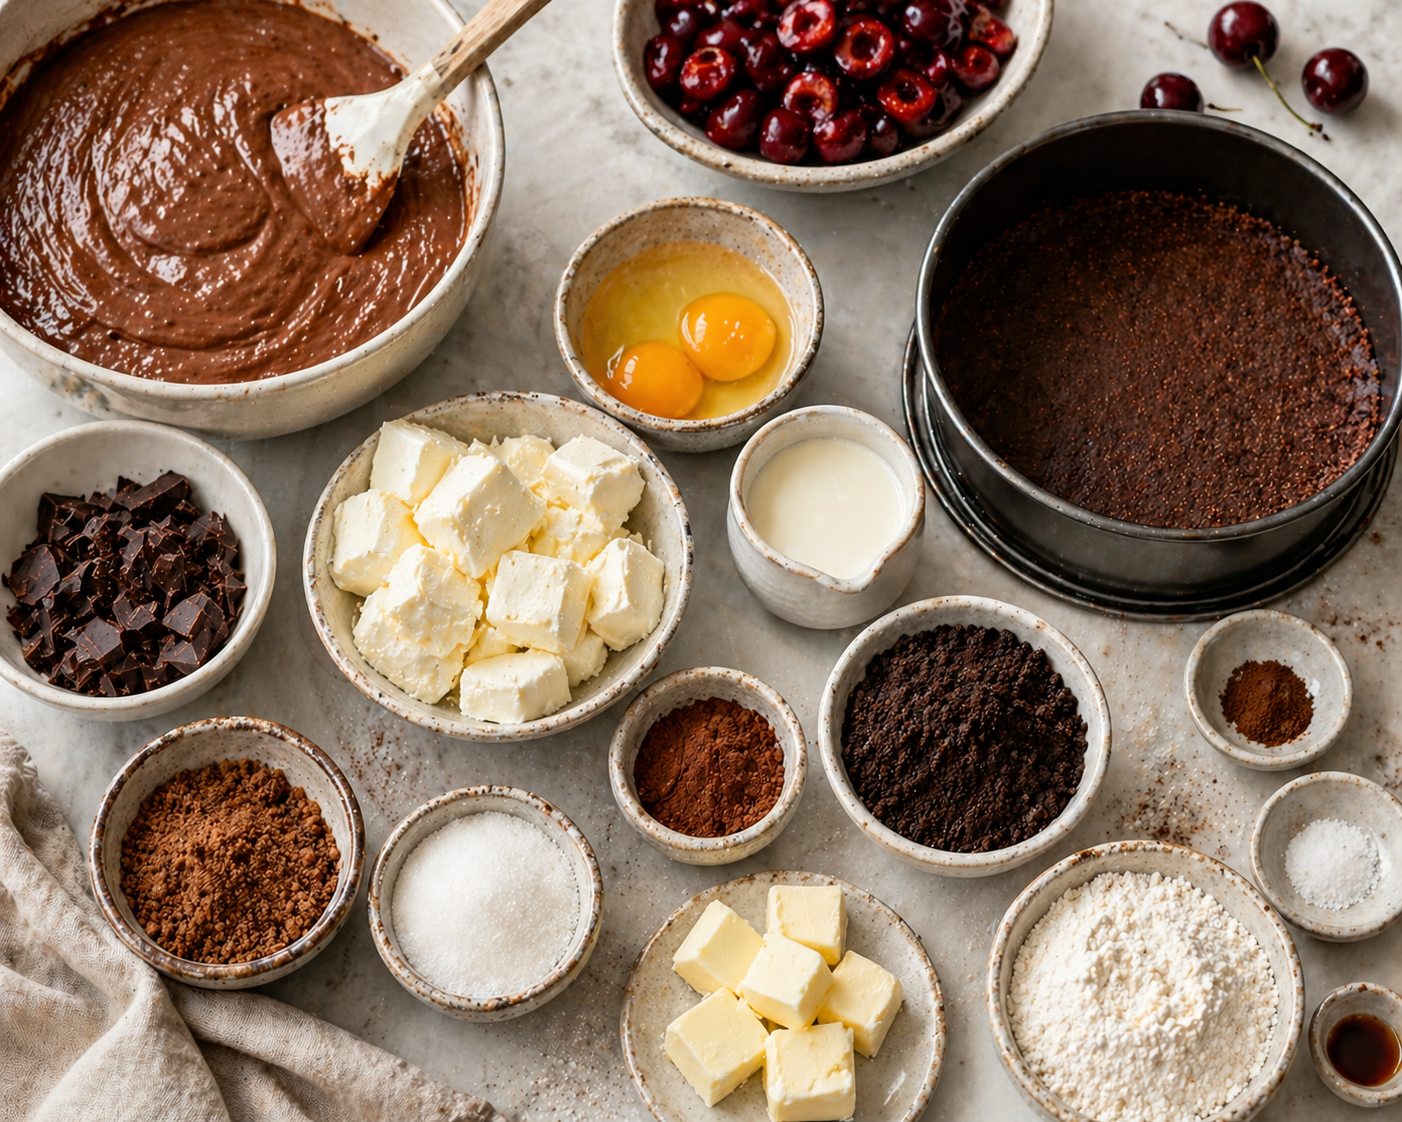
Chocolate Cheesecake Filling
505 g cream cheese, room temperature
2 tsp honey
145 g granulated sugar
18 g cocoa powder
½ tsp espresso powder
2 large eggs, room temperature
2 egg yolks, room temperature
75 ml heavy cream, room temperature
Pinch of salt
2 tsp vanilla extract
120 g dark chocolate, melted and warm
For Topping
310 g fresh cherries, pitted and sliced
Instructions
Make the Crust
Preheat oven to 350°F.
Line a 7-inch or 8-inch springform pan with a parchment round. You can also add a parchment collar if desired; an 8-inch cheesecake will be slightly thinner.
In a bowl, combine the chocolate cookie crumbs, sugar, and salt.
Pour in the melted butter and mix until a moist crumb forms.
Transfer the crumbs into the pan and press firmly into an even layer.
Bake for 12 minutes.
Remove from the oven and let cool slightly.
Wrap the outside base of the pan well with aluminum foil to protect it for the water bath.
Reduce oven temperature to 300°F.

Make the Chocolate Cheesecake Filling
In a large bowl or stand mixer, combine the cream cheese, honey, sugar, cocoa powder, and espresso powder.
Cream together until very smooth, creamy, and silky. Scrape down the bowl often so there are no hidden lumps.
Once the cream cheese mixture is completely smooth, gently fold in the eggs, egg yolks, vanilla, and salt. Mix only until mostly combined.
Add the warm melted dark chocolate and gently fold it in.
Lastly, add the heavy cream and give the cheesecake batter one final gentle fold until smooth and fully combined.
Pour the filling over the cooled chocolate crust.
Tap the pan against the counter a few times to release any excess air bubbles.
Bake
Place the springform pan into a slightly deeper baking dish or roasting pan.
Pour boiling water into the larger pan until it reaches about 2–2½ inches up the side of the cheesecake pan.
Place the whole setup onto a larger baking sheet for easier handling.
Bake at 300°F for 55 minutes to 1 hour. The edges should look set and the center should still have a slight jiggle.
Turn the oven off and let the cheesecake cool inside the oven for 1 hour. Do not open the oven door during this time.
After 1 hour, remove the cheesecake from the oven and carefully lift it out of the water bath.
Let it cool completely at room temperature.
Chill in the fridge overnight.
Remove from the Pan
The next day, place the cheesecake in the freezer for about 1 hour before decorating. This makes it much easier to remove cleanly from the pan.
If you did not use a parchment collar, warm a knife and gently glide it around the edge of the pan to release the cheesecake.
Remove the springform ring.
Decorate
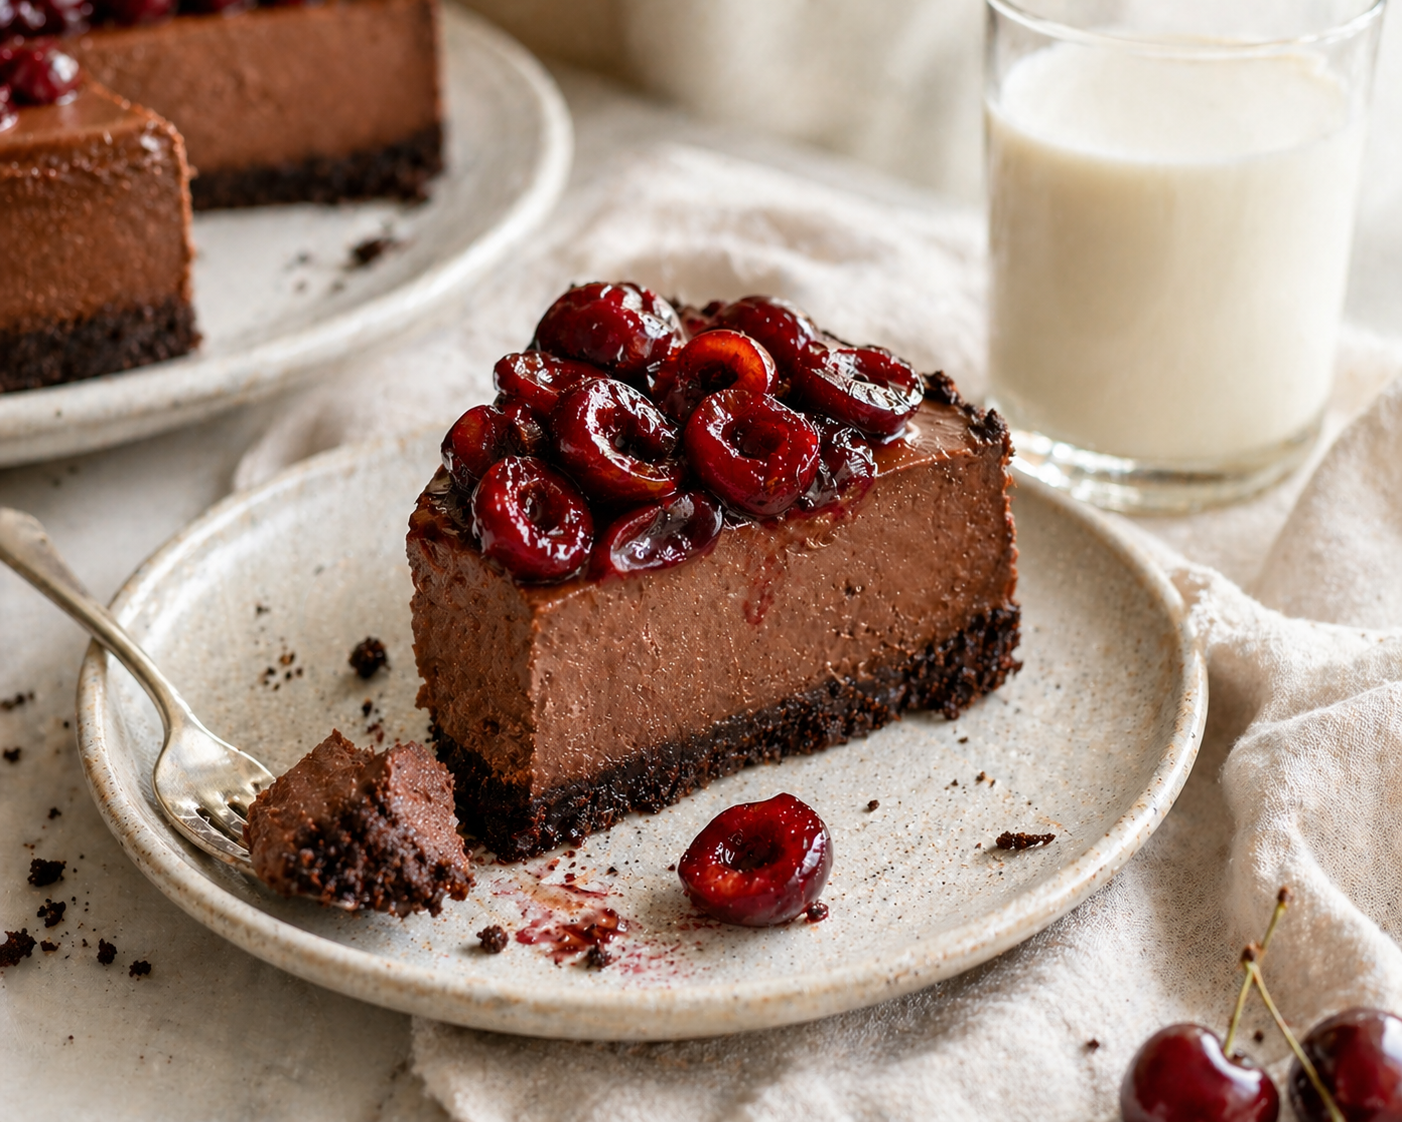
Top the chilled cheesecake with fresh pitted and sliced cherries.
You can pile them in the center for a simple bakery-style finish, or arrange them around the edges for a cleaner look.
Secrets for the Perfect Recipe
The "No-Crack" Cooling Method: Leaving the cheesecake in the oven for an hour with the door closed allows it to cool gradually, which is essential for a smooth surface.
Clean Slices: For the cleanest, balance slices, use a sharp knife warmed under hot water. Be sure to wipe the knife clean between every single cut.
The Freezer Trick: Placing the chilled cake in the freezer for one hour before unmolding ensures the sides stay perfectly smooth when the ring is removed.
Q&A Creamy Chocolate Cheesecake With Fresh Cherries
Q. Why must my ingredients be room temperature?
Cold ingredients can make the filling lumpy. Using room temperature cream cheese and eggs helps the batter stay smooth.
Q. How do I know when the cheesecake is finished baking?
The edges should look set while the center still maintains a slight jiggle. It will finish setting as it cools and chills.
Q. Can I mix the batter with a whisk?
It is recommended to gently fold the ingredients once the eggs are added. Gentle mixing keeps the cheesecake creamy and helps prevent cracks.
Q. How should this cheesecake be served?
This cheesecake is best served chilled to maintain its creamy, silky, and rich texture.
Show Me Your Work!
I love seeing your bakes! If you make this Creamy Chocolate Cheesecake With Fresh Cherries, be sure to tag @sashacakeschicago on social media so I can see your beautiful creations.

If you loved making this recipe, there’s so much more waiting for you in my book,Baking Magic: Awaken Your Inner Pastry Chef. It’s packed with simple tricks, pro tips, and show-stopping recipes to help you create unforgettable treats with ease.
Grab your copy on Amazon here and awaken your inner pastry chef today! 🍰✨
Disclaimer: Some links in this post are affiliate links, which means I may earn a small commission if you make a purchase—thank you for supporting my baking projects!

Creamy Chocolate Cheesecake With Fresh Cherries
This chocolate cheesecake is ultra-creamy, rich, silky, and deeply chocolatey without feeling too heavy. The filling is crafted with cream cheese, cocoa, espresso powder, warm melted dark chocolate, and a touch of heavy cream for the smoothest possible texture. By baking low and slow in a water bath and chilling overnight, the texture sets into a perfect dense-but-creamy slice. Finishing it with fresh cherries adds a beautiful pop of color and a juicy brightness that perfectly complements the deep chocolate flavor.
Ingredients
- 130 g Oreo cookie crumbs
- 10 g granulated sugar
- Pinch of salt
- 40 g unsalted butter, melted
- 505 g cream cheese, room temperature
- 145 g granulated sugar
- 18 g cocoa powder
- ½ tsp espresso powder
- 2 large eggs, room temperature
- 2 egg yolks, room temperature
- 75 ml heavy cream, room temperature
- Pinch of salt
- 2 tsp vanilla extract
- 120 g dark chocolate, melted and warm
- 310 g fresh cherries, pitted and sliced
Instructions
- Preheat oven to 350°F.
- Line a 7-inch or 8-inch springform pan with a parchment round. You can also add a parchment collar if desired; an 8-inch cheesecake will be slightly thinner.
- In a bowl, combine the chocolate cookie crumbs, sugar, and salt.
- Pour in the melted butter and mix until a moist crumb forms.
- Transfer the crumbs into the pan and press firmly into an even layer.
- Bake for 12 minutes.
- Remove from the oven and let cool slightly.
- Wrap the outside base of the pan well with aluminum foil to protect it for the water bath.
- Reduce oven temperature to 300°F.
- In a large bowl or stand mixer, combine the cream cheese, sugar, cocoa powder, and espresso powder.
- Cream together until very smooth, creamy, and silky. Scrape down the bowl often so there are no hidden lumps.
- Once the cream cheese mixture is completely smooth, gently fold in the eggs, egg yolks, vanilla, and salt. Mix only until mostly combined.
- Add the warm melted dark chocolate and gently fold it in.
- Lastly, add the heavy cream and give the cheesecake batter one final gentle fold until smooth and fully combined.
- Pour the filling over the cooled chocolate crust.
- Tap the pan against the counter a few times to release any excess air bubbles.
- Place the springform pan into a slightly deeper baking dish or roasting pan.
- Pour boiling water into the larger pan until it reaches about 2–2½ inches up the side of the cheesecake pan.
- Place the whole setup onto a larger baking sheet for easier handling.
- Bake at 300°F for 55 minutes to 1 hour. The edges should look set and the center should still have a slight jiggle.
- Turn the oven off and let the cheesecake cool inside the oven for 1 hour. Do not open the oven door during this time.
- After 1 hour, remove the cheesecake from the oven and carefully lift it out of the water bath.
- Let it cool completely at room temperature.
- Chill in the fridge overnight.
- The next day, place the cheesecake in the freezer for about 1 hour before decorating. This makes it much easier to remove cleanly from the pan.
- If you did not use a parchment collar, warm a knife and gently glide it around the edge of the pan to release the cheesecake.
- Remove the springform ring.
- Top the chilled cheesecake with fresh pitted and sliced cherries.
- You can pile them in the center for a simple bakery-style finish, or arrange them around the edges for a cleaner look.
Notes
- The "No-Crack" Cooling Method: Leaving the cheesecake in the oven for an hour with the door closed allows it to cool gradually, which is essential for a smooth surface.
- Clean Slices: For the cleanest, balance slices, use a sharp knife warmed under hot water. Be sure to wipe the knife clean between every single cut.
- The Freezer Trick: Placing the chilled cake in the freezer for one hour before unmolding ensures the sides stay perfectly smooth when the ring is removed.
